Creating Visually Stunning Cocktails for Social Media
In today’s visually driven world, capturing the art of cocktail making is more than just capturing a drink; it’s about creating an experience on social media. Whether you are a mixologist, a bartender, or simply someone who loves to share your drink creations online, this article provides comprehensive guidance to ensure your creations are not only delicious but visually stunning. From understanding lighting techniques to choosing the perfect glassware, and composing your shots, we break down the elements of drinks photography to transform your cocktails into social media stars. With practical tips on managing reflections and utilizing tools like polarizing filters, you’ll be ready to elevate your drink photos to new heights, engaging your audience with every post.
Do I need a DSLR?
The question of whether one needs a DSLR for capturing stunning cocktail images is common for anyone just starting. While smartphone cameras can capture impressive shots today, a DSLR or mirrorless camera offers greater flexibility, quality, and control over your images, which can be particularly beneficial when dealing with complex lighting setups or creating specific visual effects.
A DSLR allows you to change lenses, adjust depth of field, and use manual settings to tailor the photographs to your exact vision. Although it involves a steeper learning curve, the investment in time and equipment can pay off significantly with higher quality photos that stand out on social media platforms.
90% of the work is done before the ice hits the glass
Successfully capturing the beauty of a cocktail begins long before any liquid or ice touches the glass. Planning your shot in advance allows you to focus on the aesthetics, style, and mood you want to convey. Consider your theme, setting, and the color palette you wish to portray.
Ensuring all elements of your shot are prepared—glassware, garnishes, and props—before you start mixing, helps streamline the process, allowing you to focus entirely on photographing the finished product. This level of preparation is the foundation of a successful cocktail photo shoot.
Drinks photography pre-pour checklist:
Before starting on your cocktail photography, compile a checklist to make sure everything is in order. Key items to include might be confirming that your glassware is spot-free, your camera settings are accurate, your props align with the intended story, and your lighting setup is complete.
Additionally, ensure garnishes are prepped and at hand, and all ingredients are measured and ready. This methodical approach minimizes distractions and errors, allowing you to concentrate on capturing the perfect shot.
Lighting for drinks & cocktails
Lighting is a crucial component of effective cocktail photography. Whether you’re shooting in natural light or with studio lighting, understanding how light interacts with the drink can significantly influence the final image. Soft, diffused lighting often works best for cocktails, reducing harsh reflections and highlighting the drink’s colors.
Experimenting with light direction, distance, and diffusion materials, such as diffusers or softboxes, enables you to control shadows and highlights, enhancing the drink’s appeal and details.
Studio lighting for drinks photography
For those with the option to work in studio conditions, utilizing a controlled lighting environment can drastically improve the outcome of your cocktail images. Softboxes and umbrellas provide softer light, while backlighting can illuminate the transparency and texture of a beverage.
Setting up your lighting in a studio gives you consistency, allowing for precise adjustments. Off-camera flashes or continuous lights can be positioned to accentuate specific drink elements, making the images both compelling and professional-looking.
Glassware
The choice of glassware profoundly affects the composition and impact of your cocktail photograph. The shape, size, and clarity of the glass should complement the drink, elevating its visual appeal. Cleanliness is also paramount; spots and smudges are easily accentuated in photos.
Using polished and appropriate glassware aligns the image with the desired style, essentially serving as the frame that showcases your cocktail masterpiece. Different glass shapes can influence how light interacts with the drink, offering opportunities for creative imagery.
Consider scale
The scale of your composition must reflect the cocktail’s essence. Using larger props, like oversized fruit or straws, can add drama but might distract from the drink itself. Strive for balance, ensuring the drink remains the focal point of the image.
Scale can be communicated through both the glass and the elements surrounding it, reflecting the intended mood and context—sophisticated, casual, or whimsical. Adjusting scale allows you to control the viewer’s perception, directing attention where it’s needed most.
Find the best angle
Capturing the perfect angle can transform a good shot into a great one. Commonly found angles like straight-on shots exude professionalism, while overhead shots can accentuate glass rims and garnishes. Experimentation is key in finding the angle that best highlights your cocktail’s attributes.
Consider how each angle affects lighting, shadows, and reflections. Understanding angles will help you emphasize different cocktail elements and create dynamic compositions that engage viewers with their visually interesting perspective.
Compose the image
Composition plays a critical role in drink photography, guiding the viewer’s eye through the image. Balancing components—the drink, props, and background—creates harmony and interest. Using compositional techniques such as the rule of thirds and leading lines can structure your photograph elegantly.
Consider depth and layers in your image. Placing elements at varying distances from the camera can add dimensionality and intrigue, pulling the viewer deeper into the scene and rendering the cocktail into a visceral experience.
Prep garnishes in advance
Ready your garnishes before the actual photography begins. Fresh and adorned garnishes can elevate the aesthetic quality of a cocktail photo significantly. Whether it’s a twist of citrus or a mint garnish, having these ready minimizes disruptions during shooting.
Simple tricks, like soaking fruit slices in ice water prior to staging, enhance vibrancy and freshness, ensuring your garnishes complement the drink’s overall look and feel. Prepared garnishes add to the storytelling aspect of the cocktail.
Adjust and control your lighting
Fine-tuning the lighting setup is imperative to achieving desired visual effects. Adjusting light sources and modifying their intensity can change the photograph’s mood dramatically, from moody and dramatic to bright and cheerful.
Use reflectors or fabric to manipulate lighting conditions, creating balanced exposures. Regular minor adjustments and experimentation with lighting will yield the best results, offering endless possibilities in achieving distinctive looks for your cocktails.
Hard light
Employing hard light in your photography can generate bold, striking images that are full of contrast and dramatic shadows. This type of lighting emphasizes texture, making it excellent for highlighting the contours of a drink or the detail of a garnish.
While hard light creates strong and defined shadows, it requires careful positioning to avoid overshadowing the drink’s color and detail. Manage reflections wisely to ensure the beverage retains its visual appeal.
Styling & storytelling
Styling your cocktail is more than mere aesthetics; it’s about structuring a narrative that resonates with the viewer. Props add depth and context to your images, so choose items that amplify the drink’s theme, flavor profile, or origin.
Storytelling through styling can involve color matching, accompanying objects like coasters or napkins, and even atmospheric elements like ambient light. Each component seamlessly weaves into the story your cocktail seeks to convey.
Rule of odds
The rule of odds in photography suggests that having an odd number of elements in an image creates a more engaging and dynamic composition. This guideline is especially relevant in cocktail photography, where odd-numbered garnishes or props can enhance visual interest.
Whenever you clutter your composition, ensure there’s an odd number of items for equilibrium. A trio of limes, for example, provides a more harmonious visual balance, drawing the viewer’s attention to the main subject.
Elements of composition
The elements of composition such as line, shape, texture, and space are fundamental to creating visually stimulating cocktail images. Lines can guide the eye through your image, shapes add structure, texture enriches detail, and space controls focus.
Balancing these elements can create a cohesive and impactful image that not only showcases the beverage but also enhances the visual storytelling of the cocktail itself.
White space
White space, or negative space, is an essential design element that provides breathing room in your composition. Strategic use of white space emphasizes the subject and can enhance clarity, helping the main elements stand out.
Incorporating sufficient white space into your cocktail images provides a clean, modern aesthetic, and can serve as a counterbalance to busier shots, drawing focus naturally to your drink.
Create movement
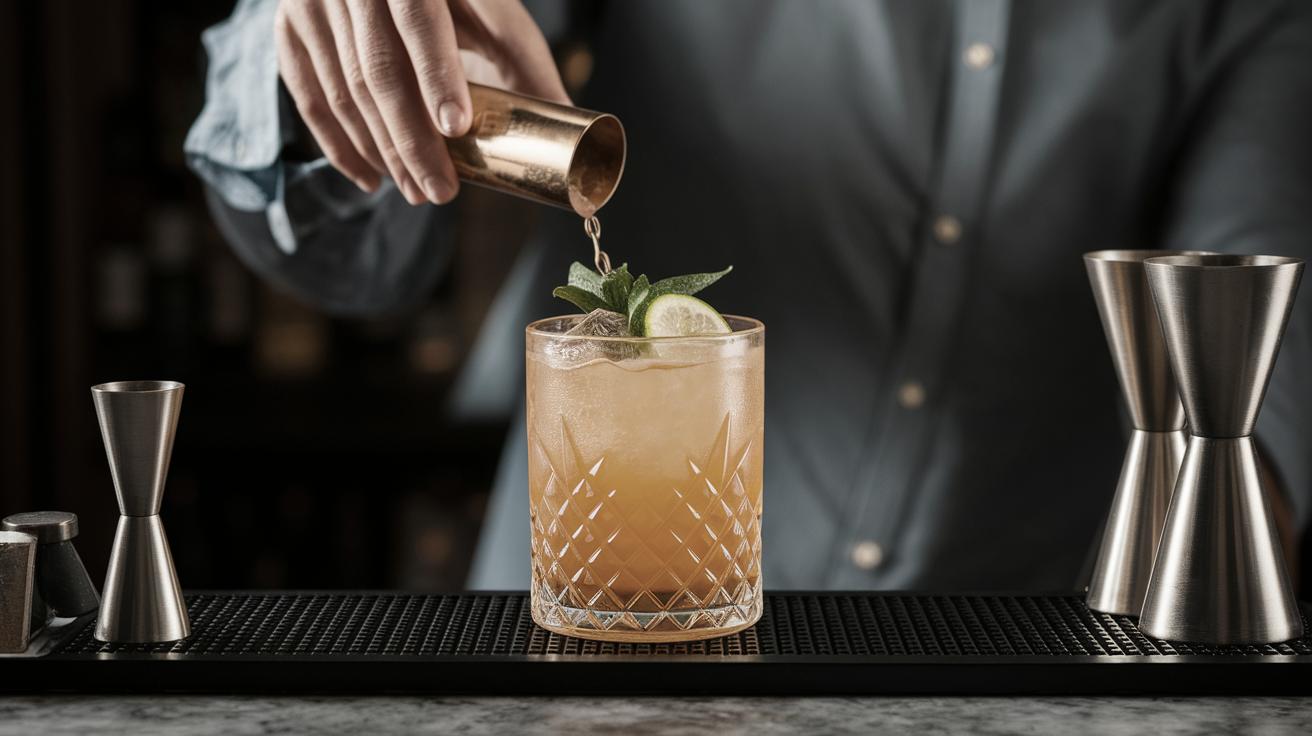
Creating a sense of movement can invigorate your cocktail images, making them dynamic and lively. Techniques such as capturing a splash or pouring liquid can imply action and narrative depth, enhancing viewer engagement with the photograph.
These active elements disrupt static compositions and breathe life into your photography, introducing energy and excitement while retaining focus on the cocktail as the primary subject.
Leading lines
Leading lines are powerful tools in directing the viewer’s attention within an image. By introducing lines that guide the eyes towards the drink, you can create a visual journey that enhances the composition’s structure and narrative.
Lines present in the setting, from table edges to straws, can be manipulated to draw focus and outline the photograph, ensuring the cocktail is always the central point of interest.
Colors and contrast
Colors and contrast are potent in cocktail photography, establishing mood and character. Vibrant hues can communicate freshness and vitality, while muted tones evoke sophistication. Contrast enhances these characteristics, bringing out hidden details and dramatic light interplay.
Mastering color harmonization enhances your drink’s perceived flavor and attractiveness. Thoughtful color pairings between the drink, garnishes, and props ensure a balanced and evocative visual presentation.
Rule of thirds
The rule of thirds is a guiding principle in photography, dividing an image into nine equal parts to create a more compelling composition. Placing the drink or its salient features along the intersecting lines often leads to balanced and alluring images.
Using this rule diversifies the shot’s layout, pulling the viewer naturally into the scene and leading them through the dimensions of the frame, adding depth to your cocktail presentations.
Depth of field
Depth of field refers to the sharpness of a subject within the scene and can be adjusted to either broaden or narrow the focus. Utilizing a shallow depth of field can isolate the cocktail, blurring the background for emphasis and minimizing distractions.
Adjusting aperture settings allows control over this factor, either drawing emphasis to specific elements of the drink or creating a sharper, more detailed view that incorporates context from the surrounding environment.
Managing reflections
Reflections are a common challenge in drink photography, as they can detract from the image’s clarity. Positioning lights thoughtfully, and employing tools like polarizing filters can minimize unwanted glare and manage reflections effectively.
Experiment with repositioning your camera and lights to reduce these reflections, ensuring they enhance rather than hinder the overall impact of your cocktail photograph.
Adjust your lighting
Adjusting your lighting plays a significant role in the final image outcome, offering flexibility to change the photograph’s tone and feel. Experimenting with light angles, distances, and diffusion helps create distinct atmospheres suitable for various cocktail themes.
Consistent adjustments lead to diverse results, making it easier to adapt to the complex environments offered by cocktail shoots, capturing them at their most flattering.
Photograph in the “window of fog”
The ephemeral “window of fog” is an opportune moment in cocktail photography, capturing drinks at their peak freshness and visual appeal right after pouring. At this moment, condensation forms delicately on the glass, conveying coldness and immediate refreshment.
Timing is essential; working swiftly ensures you preserve this moment, capturing the cocktail at its most tantalizing and visually appealing state.
Use a polarizing filter
A polarizing filter is invaluable for reducing reflections and enhancing color saturation. Primarily used in outdoor photography, it can be just as effective in controlling glare on glass surfaces in drink photography.
Use this filter to manipulate the way lights and colors interact, achieving cleaner images with improved depth and contrast, while minimizing disruptions, particularly in more reflective settings.
Consider your fill line
The fill line in your glass can dramatically impact the cocktail’s perception. A glass filled too high may seem overwhelming, while a drink filled too low may look meager. Finding the ideal balance conveys the image of an appealing, thoughtfully crafted cocktail.
Letting the liquid level complement the glassware shape and garnishes, aligns with the image’s composition enhancing the drink’s overall symmetry and attractiveness.
Quality and quantity of ice
Ice quality and quantity significantly affect both the taste and appearance of cocktails. Crystal-clear ice not only maintains drinks at an ideal temperature but also provides visual clarity and allure.
Controlling the quantity of ice helps manage dilution, ensuring the cocktail retains flavor without overwhelming the visual presentation. High-quality ice elevates the entire drink, making a considerable difference to the photograph’s appeal.
Bringing it all together for the perfect drink photo
Combining lighting, composition, styling, and careful attention to detail synthesizes all elements of drink photography, resulting in the perfect shot. Practice and patience allow for the discovery of techniques that best highlight your creative visions.
Each shot is an opportunity to refine your skillset, slowly but surely achieving images that capture the vibrant culture and experience of cocktail craftsmanship, ensuring each photo tells its unique story.
Equipment recommendations for the beginner
Beginners should start with essential equipment that provides flexibility and quality without overwhelming complexity. A DSLR or mirrorless camera with an appropriate lens is paramount, offering full creative control.
Investing in continuous or strobe lighting kits complemented with diffusers can elevate the quality of your images, offering more options to experiment and develop your style in cocktail photography.
Recommended DSLR if you’re just starting out:
For beginners, the Canon EOS Rebel T7i or Nikon D3500 are excellent entry-level DSLRs, providing a balance of ease-of-use, image quality, and affordability. Both models are user-friendly with plenty of inbuilt features to help novices develop their skills.
Features such as guided settings, robust autofocus systems, and compatibility with a wide range of lenses make these cameras ideal for budding photographers eager to advance in the field of drink photography.
Recommended lenses for shooting drinks:
A 50mm f/1.8 prime lens is a fantastic starting point for amateur drink photographers due to its versatile focal length and wide aperture, which provides flattering depth of field and accurate color rendition.
Additionally, a macro lens offers the ability to capture intricate details, such as garnishes or condensation beads, that can elevate the visual storytelling of your cocktail images significantly.
Basic continuous light kit:
A simple continuous light kit is invaluable for cocktail photography, allowing beginners to experiment with various lighting configurations and learn how different setups affect the final image.
Kits like the Neewer 660 LED Video Light offer adjustable brightness and color temperature settings, giving you versatile options to light your cocktails effectively and evolve your photographic style.
Other helpful tools:
Additional tools such as reflectors, diffusers, and editing software lie at the foundation of evolving your cocktail photography further. Reflectors and diffusers modify light quality, while editing software like Adobe Lightroom or Photoshop allows for intricate touch-ups and creative modifications.
Tools such as tripods and remote shutter releases provide stability and eliminate camera shake, ensuring you capture the sharpest image possible. These augmentations complement and enhance your photography setup, preparing you for a successful photography journey.
Summary of main points
| Aspect | Key Insights |
|---|---|
| Need for DSLR | Provides greater control and quality over images than smartphones, beneficial in complex setups. |
| Pre-Pour Preparation | Plan ahead to focus on styling, mood, and structure, determining 90% of image success. |
| Lighting | Both natural and studio lighting can dramatically affect image quality by emphasizing color and details. |
| Glassware and Scale | Choice of glass and scale affects visual appeal; cleanliness and balance are key. |
| Composition | Involves using techniques like rule of thirds, depth, and leading lines to direct viewer focus. |
| Reflective Management | Reflections must be controlled through lighting adjustments and polarizing filters for cleaner images. |
| Equipment | Recommended DSLRs, lenses, and lighting kits facilitate quality cocktail photography for beginners. |